2057clones (talk | contribs) m (→Room Desks: grammar fixes) Tag: Visual edit |
JustDoggo2YT (talk | contribs) No edit summary |
||
| (19 intermediate revisions by 12 users not shown) | |||
| Line 1: | Line 1: | ||
| − | [[File: |
+ | [[File:E4f7de64a4ab281da5cacdac2439e71a.jpg|thumb]] |
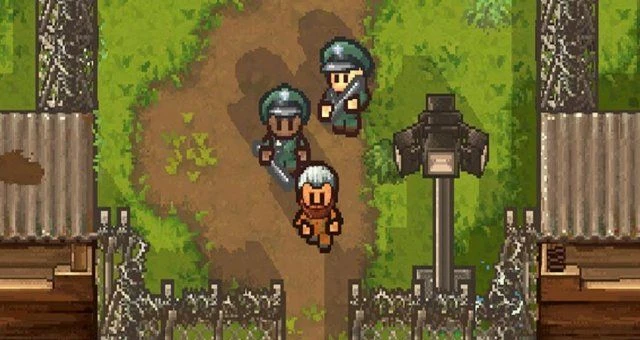
| + | '''K.A.P.O.W Camp(Kept As Prisoners Of War)''' is one of the [[Maps]] in [[The Escapists 2]]. One unique escape is needed to unlock this prison. |
||
| − | |||
| ⚫ | |||
==Description== |
==Description== |
||
| Line 8: | Line 7: | ||
==Schedule== |
==Schedule== |
||
{| class="wikitable" |
{| class="wikitable" |
||
| + | !Time |
||
| − | !Schedule |
||
| + | !'''Routine''' |
||
| − | !Event |
||
|- |
|- |
||
|08:00 - 09:00||Roll call |
|08:00 - 09:00||Roll call |
||
| Line 29: | Line 28: | ||
|21:00 - 23:00||Free Time |
|21:00 - 23:00||Free Time |
||
|- |
|- |
||
| − | |23:00 - |
+ | |23:00 - 00:00||Roll Call |
|- |
|- |
||
|00:00 - 08:00||Lights Out |
|00:00 - 08:00||Lights Out |
||
| Line 65: | Line 64: | ||
==Cell Desks== |
==Cell Desks== |
||
| − | Due to the [[Camera |
+ | Due to the [[Camera]]s located in the cell rooms, guards will be alerted if you search a desk that is not your own. |
To combat this, you can either: |
To combat this, you can either: |
||
| − | *Wear a [[Guard Outfit |
+ | *Wear a [[Guard Outfit]]: obtained by crafting or from looting an unconscious guard. |
*Move all the desks into the adjacent room below the bathroom. Because the desks are out of sight from the camera, you can freely search with no heat level. Blocking the red door is no problem, the guards will still use them and climb over/through the desks. |
*Move all the desks into the adjacent room below the bathroom. Because the desks are out of sight from the camera, you can freely search with no heat level. Blocking the red door is no problem, the guards will still use them and climb over/through the desks. |
||
*Jam the camera by using a [[Roll of Duct Tape]], which will consume the tape and temporarily disable the camera. |
*Jam the camera by using a [[Roll of Duct Tape]], which will consume the tape and temporarily disable the camera. |
||
| Line 87: | Line 86: | ||
====Preparation:==== |
====Preparation:==== |
||
| + | *Get 60 {{Item link|Intellect|alt_img=Intelligence_TE2.png}}. |
||
| − | *Get 60 [[Intelligence]]. |
||
| − | *Obtain a pair of |
+ | *Obtain a pair of {{Item link|Flimsy Cutters|alt_img=Flimsy_Cutters_te2.png}} with two {{Item link|File|alt_img=File_te2.png}} and a {{Item link|Roll of Duct Tape|alt_img=Roll_of_Duct_Tape_te2.png}}. {{Item link|Lightweight Cutters|alt_img=Lightweight_Cutters_te2.png}} tier or higher is recommended. |
| − | *Optionally, obtain a |
+ | *Optionally, obtain a {{Item link|Contraband Pouch|alt_img=Contraband_Pouch_te2.png}}. |
| − | *Obtain an outfit. This may be |
+ | *Obtain an outfit. This may be {{Item link|Infirmary Outfit|alt_img=Infirmary_Outfit_te2.png}} or a {{Item link|Guard Outfit|alt_img=Guard_Outfit_te2.png}}. |
| − | *Collect |
+ | *Collect two {{Item link|Pillow|alt_img=Pillow_te2.png}} and a {{Item link|Bed Sheet|alt_img=Bed_Sheet_te2.png}} to craft a {{Item link|Bed Dummy|alt_img=Bed_Dummy_te2.png}}. |
| − | *Obtain a |
+ | *Obtain a {{Item link|Wad of Putty|alt_img=Wad_of_Putty_te2.png}} and {{Item link|Molten Plastic|alt_img=Molten_Plastic_te2.png}} to create a {{Item link|Plastic Key|alt_img=Plastic_Red_Key_te2.png}} or {{Item link|Plastic Key|alt_img=Plastic_Purple_Key_te2.png}}. |
'''The Escape:''' |
'''The Escape:''' |
||
| − | After placing the |
+ | After placing the {{Item link|Bed Dummy|alt_img=Bed_Dummy_te2.png}} in your cell, check in to Evening Roll Call. |
Rush to the generator room. You may use the northeastern passage if you do not have a Contraband Pouch. |
Rush to the generator room. You may use the northeastern passage if you do not have a Contraband Pouch. |
||
| Line 109: | Line 108: | ||
====Preparation:==== |
====Preparation:==== |
||
| + | *Get 40 {{Item link|Intellect|alt_img=Intelligence_TE2.png}}. |
||
| − | *Get 40 [[Stats|Intelligence]]. |
||
*Search or buy 1x {{item link|Makeshift Ladder|alt_img=Makeshift Ladder te2.png}}. (Many inmates Carry Paint. beat them up to get Paint.) |
*Search or buy 1x {{item link|Makeshift Ladder|alt_img=Makeshift Ladder te2.png}}. (Many inmates Carry Paint. beat them up to get Paint.) |
||
*Search or buy 1x {{item link|Screwdriver|alt_img=Screwdriver te2.png}}, 1x{{item link|Can of Soda}}, 1x {{item link|Sugar Mint}} (commonly found on [[Guards|guards]]). |
*Search or buy 1x {{item link|Screwdriver|alt_img=Screwdriver te2.png}}, 1x{{item link|Can of Soda}}, 1x {{item link|Sugar Mint}} (commonly found on [[Guards|guards]]). |
||
*Craft 1x {{item link|Makeshift Rocket Thruster}}. |
*Craft 1x {{item link|Makeshift Rocket Thruster}}. |
||
*Locate the room with the motorcycle in the South-West side of the prison. |
*Locate the room with the motorcycle in the South-West side of the prison. |
||
| + | *If you forgot a component, there is no need to panic. Take the desk and put it under the vent and you can get out. Guards do not seem to patrol the room, so it should be safe so long as you do not lure a guard in. |
||
====The Escape:==== |
====The Escape:==== |
||
| − | *Take the Makeshift Rocket Thruster, the Screwdriver, and the Makeshift Ladder to the room north of the motorcycle and west of the Job office. |
+ | *Take the {{Item link|Makeshift Rocket Thruster|alt_img=Makeshift_Rocket_Thruster.png}}, the {{Item link|Screwdriver|alt_img=Screwdriver_te2.png}}, and the {{Item link|Makeshift Ladder|alt_img=Makeshift_Ladder_te2.png}} to the room north of the motorcycle and west of the Job office. |
| − | *Place the Makeshift Ladder below the vent. |
+ | *Place the {{Item link|Makeshift Ladder|alt_img=Makeshift_Ladder_te2.png}} below the vent. |
*Climb up your ladder (like you do when you climb a desk) and unscrew the vent. |
*Climb up your ladder (like you do when you climb a desk) and unscrew the vent. |
||
*Enter the vent and unscrew the second vent cover that leads to the room south of the Makeshift ladder. |
*Enter the vent and unscrew the second vent cover that leads to the room south of the Makeshift ladder. |
||
| Line 131: | Line 131: | ||
====Preparation:==== |
====Preparation:==== |
||
| + | *Get 60 {{Item link|Intellect|alt_img=Intelligence_TE2.png}}. |
||
| − | *Get 60 [[Stats|Intelligence]]. |
||
*Steal 2x {{item link|Bed Sheet|disp=Bed Sheets|alt_img=Bed Sheet te2.png}}. |
*Steal 2x {{item link|Bed Sheet|disp=Bed Sheets|alt_img=Bed Sheet te2.png}}. |
||
*Search or buy 1x {{item link|Length of Rope|alt_img=Length of Rope Escapists 2.png}}, 4x {{item link|Dowel}} (this is best bought from inmates), 3x {{item link|Roll of Duct Tape|alt_img=Roll of Duct Tape Escapists 2.png}}, x1 {{item link|Circuit Board|alt_img=Circuit Board te2.png}}, x1 {{item link|Wire|alt_img=Wire te2.png}}, x1 {{item link|Lighter|alt_img=Lighter te2.png}} and x1 {{item link|Comb|alt_img=Comb te2.png}} or {{item link|Toothbrush|alt_img=Toothbrush te2.png}}. |
*Search or buy 1x {{item link|Length of Rope|alt_img=Length of Rope Escapists 2.png}}, 4x {{item link|Dowel}} (this is best bought from inmates), 3x {{item link|Roll of Duct Tape|alt_img=Roll of Duct Tape Escapists 2.png}}, x1 {{item link|Circuit Board|alt_img=Circuit Board te2.png}}, x1 {{item link|Wire|alt_img=Wire te2.png}}, x1 {{item link|Lighter|alt_img=Lighter te2.png}} and x1 {{item link|Comb|alt_img=Comb te2.png}} or {{item link|Toothbrush|alt_img=Toothbrush te2.png}}. |
||
| Line 140: | Line 140: | ||
*Knock out the guard and craft {{item link|Keycard Mould|disp=Cyan Keycard Mould|alt_img=Cyan Keycard Mould.png}}. Don't forget to put original {{item link|Keycards|disp=Cyan Keycard|alt_img=Cyan Keycard.png}} back to guard's inventory or flush it down the toilet. |
*Knock out the guard and craft {{item link|Keycard Mould|disp=Cyan Keycard Mould|alt_img=Cyan Keycard Mould.png}}. Don't forget to put original {{item link|Keycards|disp=Cyan Keycard|alt_img=Cyan Keycard.png}} back to guard's inventory or flush it down the toilet. |
||
*Craft the {{item link|Keycards|alt_img=Fake Cyan Keycard.png|disp=Fake Cyan Keycard}}. |
*Craft the {{item link|Keycards|alt_img=Fake Cyan Keycard.png|disp=Fake Cyan Keycard}}. |
||
| − | *'''Optional:''' Search and grab some energy drinks or food to replenish your energy when breaking down a long wall. |
+ | *'''Optional:''' Search and grab some energy drinks or food to replenish your energy when breaking down a long wall. {{Item link|Adrenaline Shot|alt_img=Adrenaline_Shot.png}} is recommended, as there are a lot of tiles to destroy. |
====The Escape:==== |
====The Escape:==== |
||
| Line 149: | Line 149: | ||
*Head up the stairs again and make your way to the south east part of the roof where you have the wooden platform. |
*Head up the stairs again and make your way to the south east part of the roof where you have the wooden platform. |
||
*Equip all of your glider parts one by one and put them on the platform. |
*Equip all of your glider parts one by one and put them on the platform. |
||
| − | *Use your {{item link|Sturdy Pickaxe|disp=Sturdy Pickaxes|alt_img=Sturdy Pickaxe te2.png}} on the eastern wall and break all the damaged pieces. |
+ | *Use your {{item link|Sturdy Pickaxe|disp=Sturdy Pickaxes|alt_img=Sturdy Pickaxe te2.png}} on the eastern wall and break all the damaged pieces. *Be careful not to hit the second player off as it will initiate lockdown!* |
*Escape! |
*Escape! |
||
| − | + | ====Alternative Method:==== |
|
| − | Find 3x |
+ | Find 3x {{Item link|Tin of Paint|alt_img=Tin_of_Paint_te2.png}} and craft into {{Item link|Makeshift Ladder|alt_img=Makeshift_Ladder_te2.png}}. Obtain a {{Item link|Screwdriver|alt_img=Screwdriver_te2.png}} and 2x {{Item link|File|alt_img=File_te2.png}}. |
| − | Go to the |
+ | Go to the room north of the upstairs library (take the stairs next to the generator), place the {{Item link|Makeshift Ladder|alt_img=Makeshift_Ladder_te2.png}} under the vent, and screw upwards. |
Enter the vent, then turn to the left, cut through the fence and screw upwards again. You are now in the building chamber! |
Enter the vent, then turn to the left, cut through the fence and screw upwards again. You are now in the building chamber! |
||
| − | + | '''Warning:''' Once you are in, you will not be able to get out. Bring all materials necessary to escape in 1 go (or send 1 person up and the others to fetch items, as the cyan keycard door can be opened from the inside.) |
|
==Videos== |
==Videos== |
||
| Line 178: | Line 178: | ||
== Trivia == |
== Trivia == |
||
| ⚫ | |||
| − | This Prison is a reference to Prisoner of War Camps in WW2. Notably, the Glide to Victory escape is inspired by a real-life plan to escape Colditz Castle, a German camp, via a glider. Its name is a pun on Prisoner of War, which is commonly abbreviated as POW, thus forming the English onomatopoeia from which you can derive "kapow". |
+ | * This Prison is a reference to Prisoner of War Camps in WW2. Notably, the Glide to Victory escape is inspired by a real-life plan to escape Colditz Castle, a German camp, via a glider. Its name is a pun on Prisoner of War, which is commonly abbreviated as POW, thus forming the English onomatopoeia from which you can derive "kapow". |
[[Category:The Escapists 2 Maps]] |
[[Category:The Escapists 2 Maps]] |
||
Revision as of 08:23, 22 March 2022
K.A.P.O.W Camp(Kept As Prisoners Of War) is one of the Maps in The Escapists 2. One unique escape is needed to unlock this prison.
Description
Captured behind enemy lines, you and your squadron find yourself thrown in the notorious K.A.P.O.W. camp. Not content with sitting out the rest of the war, you decide to comb your quiff and find a way out of this joint in true Hollywood-heartthrob style!
Schedule
| Time | Routine |
|---|---|
| 08:00 - 09:00 | Roll call |
| 09:00 - 10:00 | Breakfast |
| 10:00 - 12:00 | Job Time |
| 12:00 - 13:00 | Exercise |
| 13:00 - 17:00 | Free Time |
| 17:00 - 18:00 | Dinner Time |
| 18:00 - 20:00 | Job Time |
| 20:00 - 21:00 | Shower Time |
| 21:00 - 23:00 | Free Time |
| 23:00 - 00:00 | Roll Call |
| 00:00 - 08:00 | Lights Out |
Jobs
| Job | Strength | Intellect | Salary |
|---|---|---|---|
| Farming | 30+ | 30+ | $40 |
| Plumbing | 40+ | 40+ | $50 |
| Kitchen | 30+ | 40+ | $60 |
| Mail Sorting | 30+ | 40+ | $60 |
Cell Desks
Due to the Cameras located in the cell rooms, guards will be alerted if you search a desk that is not your own. To combat this, you can either:
- Wear a Guard Outfit: obtained by crafting or from looting an unconscious guard.
- Move all the desks into the adjacent room below the bathroom. Because the desks are out of sight from the camera, you can freely search with no heat level. Blocking the red door is no problem, the guards will still use them and climb over/through the desks.
- Jam the camera by using a Roll of Duct Tape, which will consume the tape and temporarily disable the camera.
- Switch off the generator, since it doesn't require any keys and anyone can access it.
- Search them from the side when the cameras are facing away so they do not notice.
Escape Plans
- Perimeter Breakout
- Speed McQueen (The Motorcycle scene is a Reference to the 1963 Film The Great Escape).
- Glide To Victory (Probably based on a planned escape of Colditz Castle in WW2)
Ways To Escape
In the K.A.P.O.W. Camp there are 3 possible ways to escape.
Perimeter Breakout
Preparation:
- Get 60
 Intellect.
 - Obtain a pair of
 Flimsy Cutters with two
  File and a Roll of Duct Tape. Lightweight Cutters tier or higher is recommended.
 - Optionally, obtain a Contraband Pouch.
- Obtain an outfit. This may be Infirmary Outfit or a Guard Outfit.
- Collect two Pillow and a Bed Sheet to craft a Bed Dummy.
- Obtain a Wad of Putty and Molten Plastic to create a Plastic Key or Plastic Key.
The Escape:
After placing the ![]() Bed Dummy in your cell, check in to Evening Roll Call.
Bed Dummy in your cell, check in to Evening Roll Call.
Rush to the generator room. You may use the northeastern passage if you do not have a Contraband Pouch.
When Lights Out hits, turn off the generator and run through the red or purple door and through the Contraband Detector south of the meal hall and turn south and then south-east. Cut through the two fences.
Congratulations, you are free!
Speed McQueen
This escape is a singleplayer only escape.
Preparation:
- Get 40 Intellect.
- Search or buy 1x Makeshift Ladder. (Many inmates Carry Paint. beat them up to get Paint.)
- Search or buy 1x Screwdriver, 1x Can of Soda, 1x Sugar Mint (commonly found on guards).
- Craft 1x Makeshift Rocket Thruster.
- Locate the room with the motorcycle in the South-West side of the prison.
- If you forgot a component, there is no need to panic. Take the desk and put it under the vent and you can get out. Guards do not seem to patrol the room, so it should be safe so long as you do not lure a guard in.
The Escape:
- Take the Makeshift Rocket Thruster, the Screwdriver, and the Makeshift Ladder to the room north of the motorcycle and west of the Job office.
- Place the Makeshift Ladder below the vent.
- Climb up your ladder (like you do when you climb a desk) and unscrew the vent.
- Enter the vent and unscrew the second vent cover that leads to the room south of the Makeshift ladder.
- Equip the Makeshift Rocket Thruster on the motorcycle.
- Escape!
Note: If you want visual help on how to do this, check out the video below.
Glide To Victory
This escape is a multiplayer only escape
Preparation:
- Get 60 Intellect.
- Steal 2x Bed Sheets.
- Search or buy 1x Length of Rope, 4x Dowel (this is best bought from inmates), 3x Roll of Duct Tape, x1 Circuit Board, x1 Wire, x1 Lighter and x1 Comb or Toothbrush.
- Craft 1x Molten Plastic.
- Craft 1x Glider Skin, 2x Half Frame of Glider.
- Craft 2x Sturdy Pickaxe (at least the sturdy version of them).
- Take Circuit Board and Wire and locate the guard with the Cyan Keycard. He is the one that usually stands in the place just outside the solitary confinement when not on patrol.
- Knock out the guard and craft Cyan Keycard Mould. Don't forget to put original Cyan Keycard back to guard's inventory or flush it down the toilet.
- Craft the Fake Cyan Keycard.
- Optional: Search and grab some energy drinks or food to replenish your energy when breaking down a long wall. Adrenaline Shot is recommended, as there are a lot of tiles to destroy.
The Escape:
- Take all of your items.
- Run to the library next to the kitchen and head up the stairs.
- Use your Fake Cyan Keycard on the cyan keycard lock which is located on the wall from the right and let the second player come in.
- Head up the stairs again and make your way to the south east part of the roof where you have the wooden platform.
- Equip all of your glider parts one by one and put them on the platform.
- Use your Sturdy Pickaxes on the eastern wall and break all the damaged pieces. *Be careful not to hit the second player off as it will initiate lockdown!*
- Escape!
Alternative Method:
Find 3x ![]() Tin of Paint and craft into
Tin of Paint and craft into ![]() Makeshift Ladder. Obtain a
Makeshift Ladder. Obtain a ![]() Screwdriver and 2x
Screwdriver and 2x ![]() File.
File.
Go to the room north of the upstairs library (take the stairs next to the generator), place the ![]() Makeshift Ladder under the vent, and screw upwards.
Makeshift Ladder under the vent, and screw upwards.
Enter the vent, then turn to the left, cut through the fence and screw upwards again. You are now in the building chamber!
Warning: Once you are in, you will not be able to get out. Bring all materials necessary to escape in 1 go (or send 1 person up and the others to fetch items, as the cyan keycard door can be opened from the inside.)
Videos
Glide to Victory Escape Guide
Perimeter Breakout Escape Guide
https://www.youtube.com/watch?v=C2OxSglpLdM
Speed McQueen Escape Guide
Unique Items
Trivia
- Upon entering, during the cutscenes where the warden gives you the tour, he says that the 3rd floor is haunted. He may just be saying that because this is actually the way of the "Glide to Victory" escape.
- This Prison is a reference to Prisoner of War Camps in WW2. Notably, the Glide to Victory escape is inspired by a real-life plan to escape Colditz Castle, a German camp, via a glider. Its name is a pun on Prisoner of War, which is commonly abbreviated as POW, thus forming the English onomatopoeia from which you can derive "kapow".