Snakelauncher (talk | contribs) m (→Schedule) |
m (Literally vandalism) Tag: Undo |
||
| (30 intermediate revisions by 24 users not shown) | |||
| Line 4: | Line 4: | ||
==Description== |
==Description== |
||
| − | Billed as an institution "designed to solve the problem of Earth’s overcrowded prisons", the Anomaly is the game's hardest-to-escape-from fortress that's packed with robotic guards, cameras, contraband detectors, and dogs, and is overseen by an AI warden. Luckily, the prison's space-age tech isn't exclusive to the establishment, as you'll have the chance to leverage jet packs and shuttles as you plan your interstellar escape. |
+ | Billed as an institution "designed to solve the problem of Earth’s overcrowded prisons", the Anomaly is the game's hardest-to-escape-from fortress that's packed with robotic guards, cameras, contraband detectors, and dogs, and is overseen by an AI warden. These methods are used to make sure no prisoners escape. Luckily, the prison's space-age tech isn't exclusive to the establishment, as you'll have the chance to leverage jet packs and shuttles as you plan your interstellar escape. |
== Schedule == |
== Schedule == |
||
{| class="wikitable" |
{| class="wikitable" |
||
| + | !Time |
||
| − | !Schedule |
||
!Event |
!Event |
||
|- |
|- |
||
| − | |14:00-15:00 |
+ | |14:00 - 15:00 |
| + | |Afternoon Rollcall |
||
| − | |Roll Call |
||
|- |
|- |
||
| − | |15:00-16:00 |
+ | |15:00 - 16:00 |
|Breakfast Time |
|Breakfast Time |
||
|- |
|- |
||
| − | |16:00-17:00 |
+ | |16:00 - 17:00 |
| − | |Free Time |
+ | |Afternoon Free Time |
|- |
|- |
||
| − | |17:00-20:00 |
+ | |17:00 - 20:00 |
| − | | |
+ | |Job Time |
|- |
|- |
||
| − | |20:00-21:00 |
+ | |20:00 - 21:00 |
| − | |Free Time |
+ | |Evening Free Time |
|- |
|- |
||
| − | |21:00-22:00 |
+ | |21:00 - 22:00 |
|Exercise Time |
|Exercise Time |
||
|- |
|- |
||
| − | |22:00-23:00 |
+ | |22:00 - 23:00 |
|Lunch Time |
|Lunch Time |
||
|- |
|- |
||
| − | |23:00- |
+ | |23:00 - 00:00 |
| + | |Evening Rollcall |
||
| − | |Roll Call |
||
|- |
|- |
||
| − | | |
+ | |00:00 - 01:00 |
|Free Time |
|Free Time |
||
|- |
|- |
||
| − | | |
+ | |01:00 - 04:00 |
| − | | |
+ | |Job Time |
|- |
|- |
||
| − | | |
+ | |04:00 - 05:00 |
|Dinner Time |
|Dinner Time |
||
|- |
|- |
||
| − | | |
+ | |05:00 - 06:00 |
|Shower Time |
|Shower Time |
||
|- |
|- |
||
| − | | |
+ | |06:00 - 07:00 |
| − | |Roll Call |
+ | |Morning Roll Call |
|- |
|- |
||
| − | | |
+ | |07:00 - 08:00 |
| − | |Free Time |
+ | |Morning Free Time |
|- |
|- |
||
| − | | |
+ | |08:00 - 14:00 |
|Lights Out |
|Lights Out |
||
| + | |} |
||
| + | |||
| ⚫ | |||
| + | {| class="wikitable" |
||
| + | |+ |
||
| + | ![[Jobs]] |
||
| + | ![[Strength]] |
||
| + | ![[Intelligence]] |
||
| + | !Income |
||
| + | |- |
||
| + | |Mining |
||
| + | |70+ |
||
| + | |30+ |
||
| + | |$45 |
||
| + | |- |
||
| + | |Kitchen |
||
| + | |30+ |
||
| + | |40+ |
||
| + | |$60 |
||
| + | |- |
||
| + | |Farming |
||
| + | |30+ |
||
| + | |30+ |
||
| + | |$40 |
||
| + | |- |
||
| + | |Engineering |
||
| + | |30+ |
||
| + | |80+ |
||
| + | |$75 |
||
|} |
|} |
||
| Line 61: | Line 90: | ||
=== '''Race From Space''' === |
=== '''Race From Space''' === |
||
'''Gamemodes:''' Singleplayer only. |
'''Gamemodes:''' Singleplayer only. |
||
| + | '''Method 1 (Safe Method):''' |
||
| − | * Increase your intellect to 60 (70 to upgrade the contraband pouch |
+ | * Increase your intellect to 60 (70 to upgrade the contraband pouch. Useful, but not necessary). |
| − | * You'll need to get the following |
+ | * You'll need to get the following: |
| − | ** |
+ | **[[Screwdriver]] or [[Crowbar]] or 2 [[Energy Module]]s |
| − | ** A Contraband Pouch |
+ | ** A [[Contraband Pouch]] |
| − | **A Red Key |
||
| + | **A Plastic Red [[Keys|Key]] |
||
| − | * Obtain a |
+ | * Obtain a [[Jet Pack]]. You can obtain a Jetpack by doing the following: |
| − | ** |
+ | ** [[Control Room]]: Find a screwdriver or crowbar and head to the unlocked room between the Control Room and eastern maintenance room. Place a desk underneath the vent in that room and unscrew the vent. Go east, remove the second vent and go down to get the Jetpack from the [[Desk]], then leave. |
| − | ** |
+ | **Force Field: Go to the corner near the front of the [[Control Room]] but go north. Slip past the contraband detector and go upstairs where there is a desk guarded by a force field (which somehow cannot be deactivated with a shutdown of the [[generator]]). You have to head to the computer by the top right and disable it with the 2 Energy Modules. Then get the Jetpack. |
| − | |||
| − | * Head all the way to the |
+ | * Head all the way to the west, to an area where several dogs reside, protected by red doors and [[Scanner]]s. Go through the halls and into the room with the [[Warden]] in it (a large black box with a red light). Go to the upper left corner of the room, and holding the Jet Pack, interact with the button. |
* Escape! |
* Escape! |
||
| + | '''Method 2 (Fast Method):''' |
||
| + | * Get the Jet Pack using the contraband desk route. |
||
| + | * Beat up guards until you get the red key (or simply take note of the targeted guard's name in the selection screen.) You may want to train your stats or acquire a weapon, but this is optional. |
||
| + | * Steal the key. Make sure you knock out the guard while near the warden's room, this will give you more time before the [[Medic]]s arrive and take the guard away. If the guard wakes up while you still have the key, a [[Lockdown]] will occur, but this should not happen if you are fast enough and made sure to KO the guard near the entrance. |
||
| + | * Run into the hall and through the scanners. Your heat will rise instantly, but dogs take time to sniff contraband, giving you a few seconds to run. |
||
| + | * Go into the warden's room holding the Jet Pack in hand. Pull the switch and escape! |
||
=== '''Perimeter Breakout''' === |
=== '''Perimeter Breakout''' === |
||
'''Gamemodes:''' Singleplayer and Multiplayer. |
'''Gamemodes:''' Singleplayer and Multiplayer. |
||
| + | |||
| + | METHOD 1: |
||
| + | |||
* Increase your intellect to 60 (50 if you would rather get 2 lightweight cutters) |
* Increase your intellect to 60 (50 if you would rather get 2 lightweight cutters) |
||
* You'll need to get the following: |
* You'll need to get the following: |
||
| − | ** |
+ | **[[Screwdriver]] |
| − | ** |
+ | **[[Sturdy Cutters]] (Or 2 [[Lightweight Cutters|lightweight cutters]] if you managed to get 2 for cheaper). |
* Head to the shower room, and below it should be a small medic room, then a room w/ a purple key. Head up to the top. |
* Head to the shower room, and below it should be a small medic room, then a room w/ a purple key. Head up to the top. |
||
| − | * Head to the bottom fence and cut through it. |
+ | * Head to the bottom fence and cut through it. |
* Head to the desk, and in the top left of the desk room should be a vent. Enter the vent with the screwdriver and then cut '''ALL''' of the fences until the end. |
* Head to the desk, and in the top left of the desk room should be a vent. Enter the vent with the screwdriver and then cut '''ALL''' of the fences until the end. |
||
| − | * Exit the vent, and head up and out to the |
+ | * Exit the vent, and head up and out to the spaceship. |
| + | |||
| − | + | Escape! |
|
| + | |||
| + | METHOD 2: Speedrunning method. This method branches off into two plans; a low-risk plan and a high-risk plan. Tip: Rename the 3rd officer in the menu to "Red Key" since he will always have the red key. |
||
| + | |||
| + | * Get 2 [[File|files]] |
||
| + | * Get 1 [[screwdriver]] |
||
| + | *Craft a [[Wad of Putty]] and raise intellect to 60. Get [[Molten Plastic]] as well. (Low-risk plan only) |
||
| + | *Knock out a guard with a red key and craft a [[Plastic Key|Plastic Red Key]] with the Putty and the Molten Plastic. Return the real key to the guard. (Low-risk plan only) |
||
| + | * Steal a red key from a guard. (High-risk plan only) |
||
| + | * Head to the storage room with dark plaid floors right of the greenhouse entrance. |
||
| + | * Move the desk to the middle to match the Vent. |
||
| + | * Unscrew the Vent. |
||
| + | * Once you open the vent, go all the way east, then south and unscrew the vent up. |
||
| + | * Go up again and you'll be in a room. |
||
| + | * Go north until the red door. Go through that red door. |
||
| + | * Drop the real key so the dogs won't find you. (High-risk plan only) |
||
| + | * Go out the purple door, and with the 2 files, cut through the fence and make your escape. |
||
=== '''Peas In A Pod''' === |
=== '''Peas In A Pod''' === |
||
'''Gamemodes:''' Multiplayer only. |
'''Gamemodes:''' Multiplayer only. |
||
| + | |||
| − | + | Raise at least one player’s [[Stats|intelligence]] to 60. |
|
| + | |||
* Acquire 2x {{item link|Battery|alt_img=Battery_te2.png}}, 1x {{item link|Wire|alt_img=Wire_te2.png}}, 1x {{item link|Medical Mesh}}, and 1x {{item link|Tank of Oxygen}}. ({{item link|Medical Mesh}} can be found in medical desks, for this you will need an {{item link|Inmate Outfit|alt_img=Inmate Outfit_te2.png}} OR a {{item link|Guard Outfit|alt_img=Guard Outfit_te2.png}} and a {{item link|Tub of Bleach|alt_img=Tub of Bleach_te2.png}} to craft an {{item link|Infirmary Outfit|alt_img=Infirmary Outfit_te2.png}}. You can find {{item link|Battery|alt_img=Battery_te2.png}} on guards.) |
* Acquire 2x {{item link|Battery|alt_img=Battery_te2.png}}, 1x {{item link|Wire|alt_img=Wire_te2.png}}, 1x {{item link|Medical Mesh}}, and 1x {{item link|Tank of Oxygen}}. ({{item link|Medical Mesh}} can be found in medical desks, for this you will need an {{item link|Inmate Outfit|alt_img=Inmate Outfit_te2.png}} OR a {{item link|Guard Outfit|alt_img=Guard Outfit_te2.png}} and a {{item link|Tub of Bleach|alt_img=Tub of Bleach_te2.png}} to craft an {{item link|Infirmary Outfit|alt_img=Infirmary Outfit_te2.png}}. You can find {{item link|Battery|alt_img=Battery_te2.png}} on guards.) |
||
* Craft an {{item link|Energy Module|}}. |
* Craft an {{item link|Energy Module|}}. |
||
| Line 96: | Line 153: | ||
==Gallery== |
==Gallery== |
||
<gallery> |
<gallery> |
||
| − | U.S.S. Anomaly 1.jpg |
+ | File:U.S.S. Anomaly 1.jpg |
| − | U.S.S. Anomaly 2.jpg |
+ | File:U.S.S. Anomaly 2.jpg |
| − | U.S.S. Anomaly 3.jpg |
+ | File:U.S.S. Anomaly 3.jpg |
| − | U.S.S. Anomaly 4.jpg |
+ | File:U.S.S. Anomaly 4.jpg |
</gallery> |
</gallery> |
||
| Line 112: | Line 169: | ||
{{#ev:youtube|h9Z88g7xnL4|300}} |
{{#ev:youtube|h9Z88g7xnL4|300}} |
||
| − | '''Race From Space Escape Guide (Complete Run 7:35 Start to Finish |
+ | '''Race From Space Escape Guide (Complete Run 7:35 Start to Finish''' |
{{#ev:youtube|-5LO94bxmPM|300}} |
{{#ev:youtube|-5LO94bxmPM|300}} |
||
| + | |||
| + | == Trivia == |
||
| + | |||
| ⚫ | |||
| + | * Guards in this prison have more unique loot than others when knocked out. This can include Batteries, Wire, Bolts and Circuit Boards. |
||
| + | *Dispite the guards look like robots(And from the name of [[Makeshift Robot Guard Outfit]]) they are actually human, seen when you take the [[Guard Outfit]] from the guards. |
||
| + | |||
| + | == Unique items == |
||
| + | Non-Contraband items exclusive to this prison: [[Golf Ball]], [[Precious Mineral]], [[Unidentified Skull]], etc. |
||
| + | |||
| + | Contraband items exclusive to this map: [[Jet Pack|Jetpack]], [[Makeshift Robot Guard Outfit]], etc. |
||
==See also== |
==See also== |
||
*[[Maps]] |
*[[Maps]] |
||
| ⚫ | |||
| ⚫ | |||
| ⚫ | |||
| ⚫ | |||
Revision as of 16:08, 19 July 2021
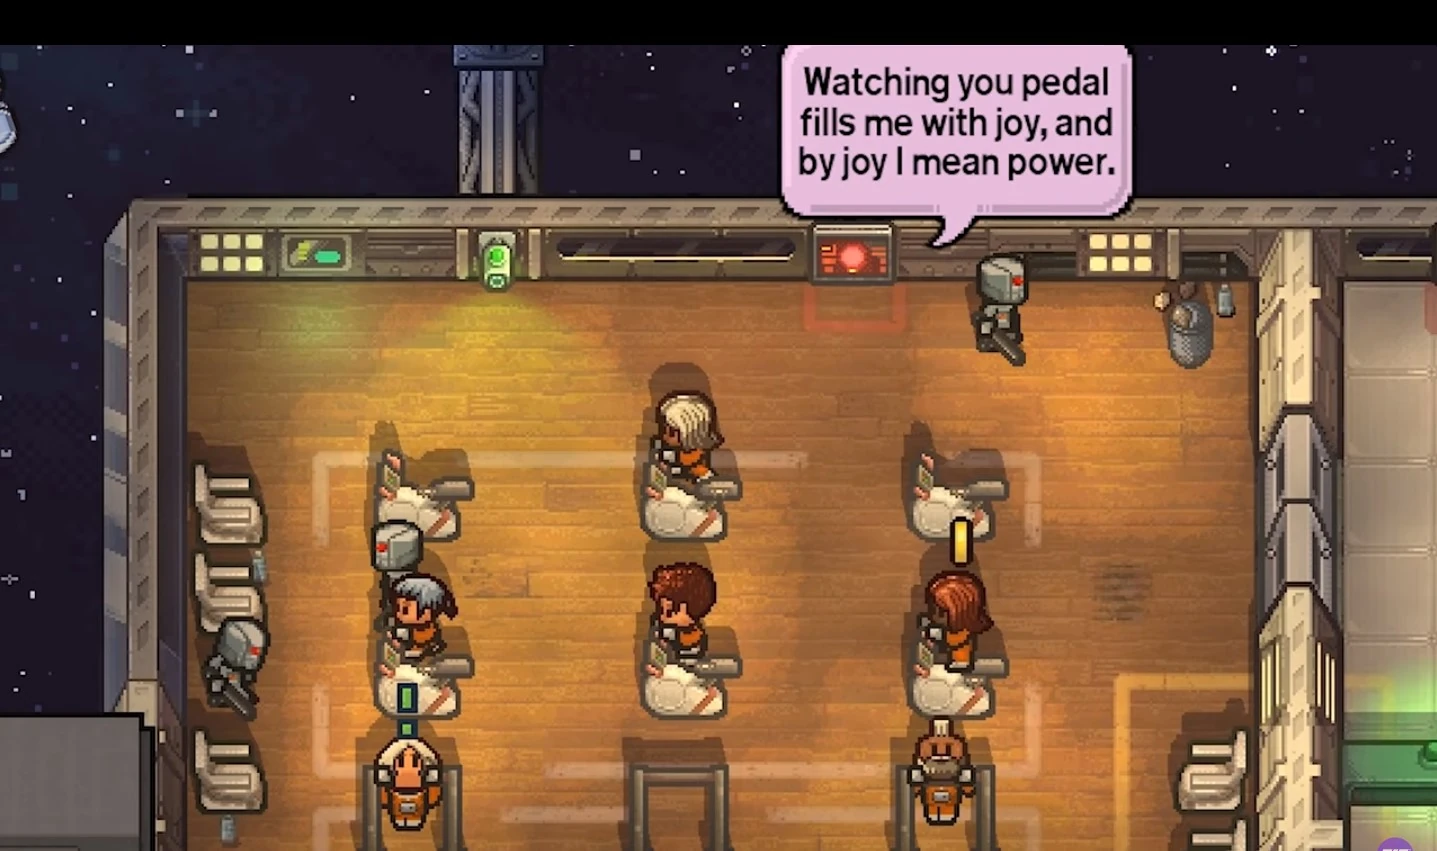
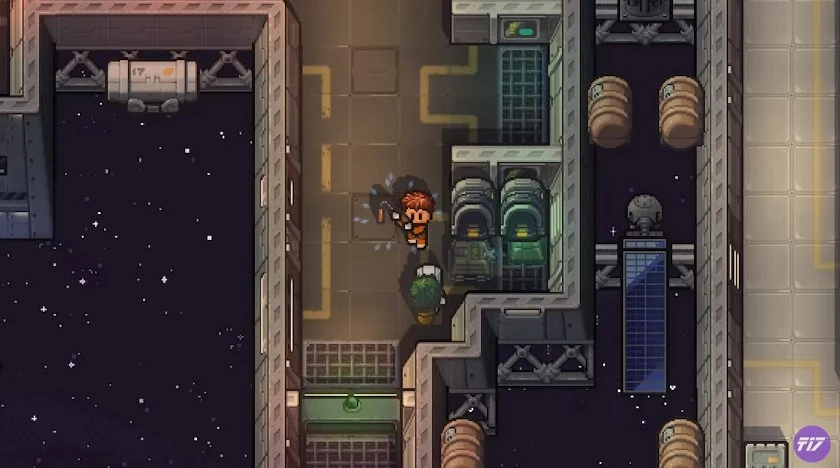
The U.S.S. Anomaly is one of the maps in The Escapists 2. Ten keys are needed to unlock this prison. It is the last and hardest prison in the game.
Description
Billed as an institution "designed to solve the problem of Earth’s overcrowded prisons", the Anomaly is the game's hardest-to-escape-from fortress that's packed with robotic guards, cameras, contraband detectors, and dogs, and is overseen by an AI warden. These methods are used to make sure no prisoners escape. Luckily, the prison's space-age tech isn't exclusive to the establishment, as you'll have the chance to leverage jet packs and shuttles as you plan your interstellar escape.
Schedule
| Time | Event |
|---|---|
| 14:00 - 15:00 | Afternoon Rollcall |
| 15:00 - 16:00 | Breakfast Time |
| 16:00 - 17:00 | Afternoon Free Time |
| 17:00 - 20:00 | Job Time |
| 20:00 - 21:00 | Evening Free Time |
| 21:00 - 22:00 | Exercise Time |
| 22:00 - 23:00 | Lunch Time |
| 23:00 - 00:00 | Evening Rollcall |
| 00:00 - 01:00 | Free Time |
| 01:00 - 04:00 | Job Time |
| 04:00 - 05:00 | Dinner Time |
| 05:00 - 06:00 | Shower Time |
| 06:00 - 07:00 | Morning Roll Call |
| 07:00 - 08:00 | Morning Free Time |
| 08:00 - 14:00 | Lights Out |
Jobs
| Jobs | Strength | Intelligence | Income |
|---|---|---|---|
| Mining | 70+ | 30+ | $45 |
| Kitchen | 30+ | 40+ | $60 |
| Farming | 30+ | 30+ | $40 |
| Engineering | 30+ | 80+ | $75 |
Strategies / Ways to Escape
Race From Space
Gamemodes: Singleplayer only. Method 1 (Safe Method):
- Increase your intellect to 60 (70 to upgrade the contraband pouch. Useful, but not necessary).
- You'll need to get the following:
- Screwdriver or Crowbar or 2 Energy Modules
- A Contraband Pouch
- A Plastic Red Key
- Obtain a Jet Pack. You can obtain a Jetpack by doing the following:
- Control Room: Find a screwdriver or crowbar and head to the unlocked room between the Control Room and eastern maintenance room. Place a desk underneath the vent in that room and unscrew the vent. Go east, remove the second vent and go down to get the Jetpack from the Desk, then leave.
- Force Field: Go to the corner near the front of the Control Room but go north. Slip past the contraband detector and go upstairs where there is a desk guarded by a force field (which somehow cannot be deactivated with a shutdown of the generator). You have to head to the computer by the top right and disable it with the 2 Energy Modules. Then get the Jetpack.
- Head all the way to the west, to an area where several dogs reside, protected by red doors and Scanners. Go through the halls and into the room with the Warden in it (a large black box with a red light). Go to the upper left corner of the room, and holding the Jet Pack, interact with the button.
- Escape!
Method 2 (Fast Method):
- Get the Jet Pack using the contraband desk route.
- Beat up guards until you get the red key (or simply take note of the targeted guard's name in the selection screen.) You may want to train your stats or acquire a weapon, but this is optional.
- Steal the key. Make sure you knock out the guard while near the warden's room, this will give you more time before the Medics arrive and take the guard away. If the guard wakes up while you still have the key, a Lockdown will occur, but this should not happen if you are fast enough and made sure to KO the guard near the entrance.
- Run into the hall and through the scanners. Your heat will rise instantly, but dogs take time to sniff contraband, giving you a few seconds to run.
- Go into the warden's room holding the Jet Pack in hand. Pull the switch and escape!
Perimeter Breakout
Gamemodes: Singleplayer and Multiplayer.
METHOD 1:
- Increase your intellect to 60 (50 if you would rather get 2 lightweight cutters)
- You'll need to get the following:
- Screwdriver
- Sturdy Cutters (Or 2 lightweight cutters if you managed to get 2 for cheaper).
- Head to the shower room, and below it should be a small medic room, then a room w/ a purple key. Head up to the top.
- Head to the bottom fence and cut through it.
- Head to the desk, and in the top left of the desk room should be a vent. Enter the vent with the screwdriver and then cut ALL of the fences until the end.
- Exit the vent, and head up and out to the spaceship.
Escape!
METHOD 2: Speedrunning method. This method branches off into two plans; a low-risk plan and a high-risk plan. Tip: Rename the 3rd officer in the menu to "Red Key" since he will always have the red key.
- Get 2 files
- Get 1 screwdriver
- Craft a Wad of Putty and raise intellect to 60. Get Molten Plastic as well. (Low-risk plan only)
- Knock out a guard with a red key and craft a Plastic Red Key with the Putty and the Molten Plastic. Return the real key to the guard. (Low-risk plan only)
- Steal a red key from a guard. (High-risk plan only)
- Head to the storage room with dark plaid floors right of the greenhouse entrance.
- Move the desk to the middle to match the Vent.
- Unscrew the Vent.
- Once you open the vent, go all the way east, then south and unscrew the vent up.
- Go up again and you'll be in a room.
- Go north until the red door. Go through that red door.
- Drop the real key so the dogs won't find you. (High-risk plan only)
- Go out the purple door, and with the 2 files, cut through the fence and make your escape.
Peas In A Pod
Gamemodes: Multiplayer only.
Raise at least one player’s intelligence to 60.
- Acquire 2x
 Battery, 1x Wire, 1x Medical Mesh, and 1x Tank of Oxygen. ( Medical Mesh can be found in medical desks, for this you will need an Inmate Outfit OR a Guard Outfit and a Tub of Bleach to craft an Infirmary Outfit. You can find Battery on guards.)
 - Craft an Energy Module.
- With all of these items in your inventory, head to the double doors just above the cafeteria. Go up the staircase and then through either of the Multiplayer doors.
- Insert your items into the second (starting from the top) escape pod on the right.
- Escape!
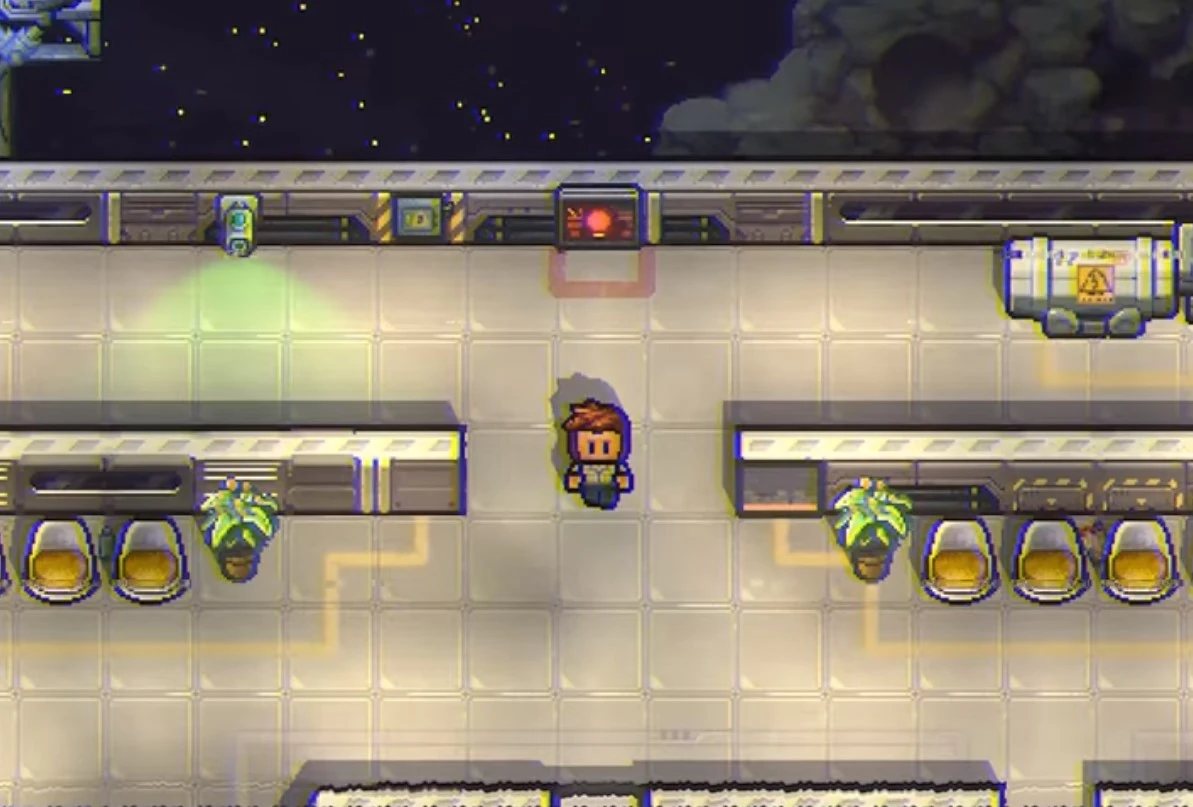
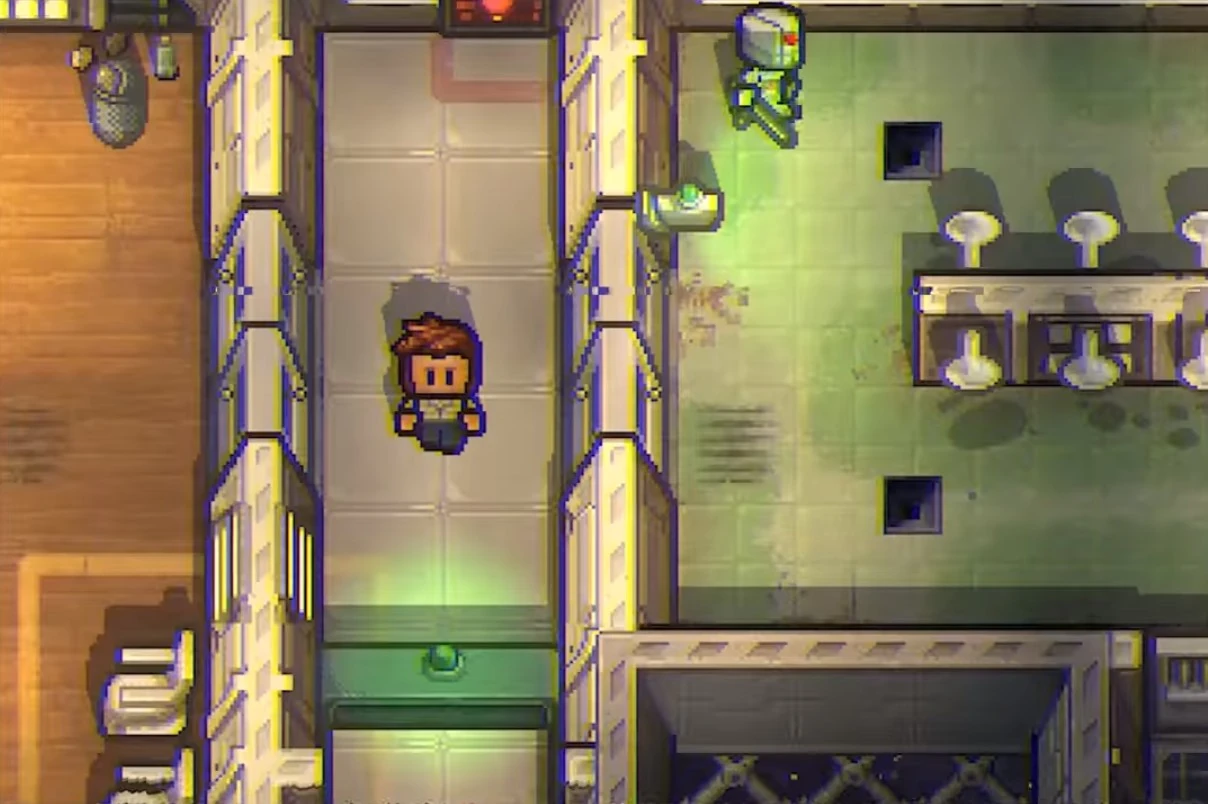
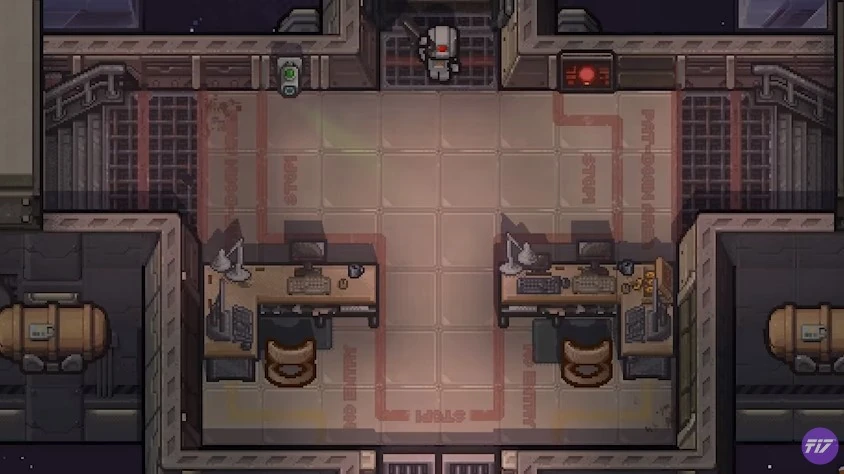
Gallery
Videos
U.S.S. Anomaly Trailer
Peas In A Pod Escape Guide
Perimeter Breakout Escape Guide (Easy Vent Route]
Race From Space Escape Guide (Complete Run 7:35 Start to Finish
Trivia
- The warden appears to be based on Hal 9000 from 2001: A Space Odyssey, featuring the characteristic red "eye."
- Guards in this prison have more unique loot than others when knocked out. This can include Batteries, Wire, Bolts and Circuit Boards.
- Dispite the guards look like robots(And from the name of Makeshift Robot Guard Outfit) they are actually human, seen when you take the Guard Outfit from the guards.
Unique items
Non-Contraband items exclusive to this prison: Golf Ball, Precious Mineral, Unidentified Skull, etc.
Contraband items exclusive to this map: Jetpack, Makeshift Robot Guard Outfit, etc.